Admittedly, after 36 years of marriage, you’d think I would have some experience making cards for the handsome man in my life! Since I didn’t find paper crafting until well past the dating years, I have to admit this class threw me a little. Leave it to Atlenew to save the day with the first lesson, in the series of six, for this class. It was all about geometrics.
Most of my Altenew inventory, if not all of my Atlenew inventory, is full of floral dies, floral stamps, floral embossing folders and stencils…except one! Thankfully, I had purchased the Altenew Dodec Star Die early on in my introduction to Atlenew so that geometric set became my card inspiration.

The color pallet for this masculine cards is very basic. Starting with a black card base and adding a kraft card stock panel, I built this card using one simple die from the Dodec set cutting several times from black card stock and then white card stock. Seperating all the small pieces, I glued two black outlines to the kraft stock and then one white outline to the kraft stock. Just like a small jigsaw puzzle, I began to glue the inside pieces from each cutting until all three geometric images were complete.
Placing the die cuts into each design is a tedious but very therapeutic process that I grew to enjoy.
Finally, I stamped the “THANK YOU” sentiment from the Altenew “Many Thanks” stamp set. Adding one last white geometric outline to my black envelope liner, the card and envelope are ready to go!
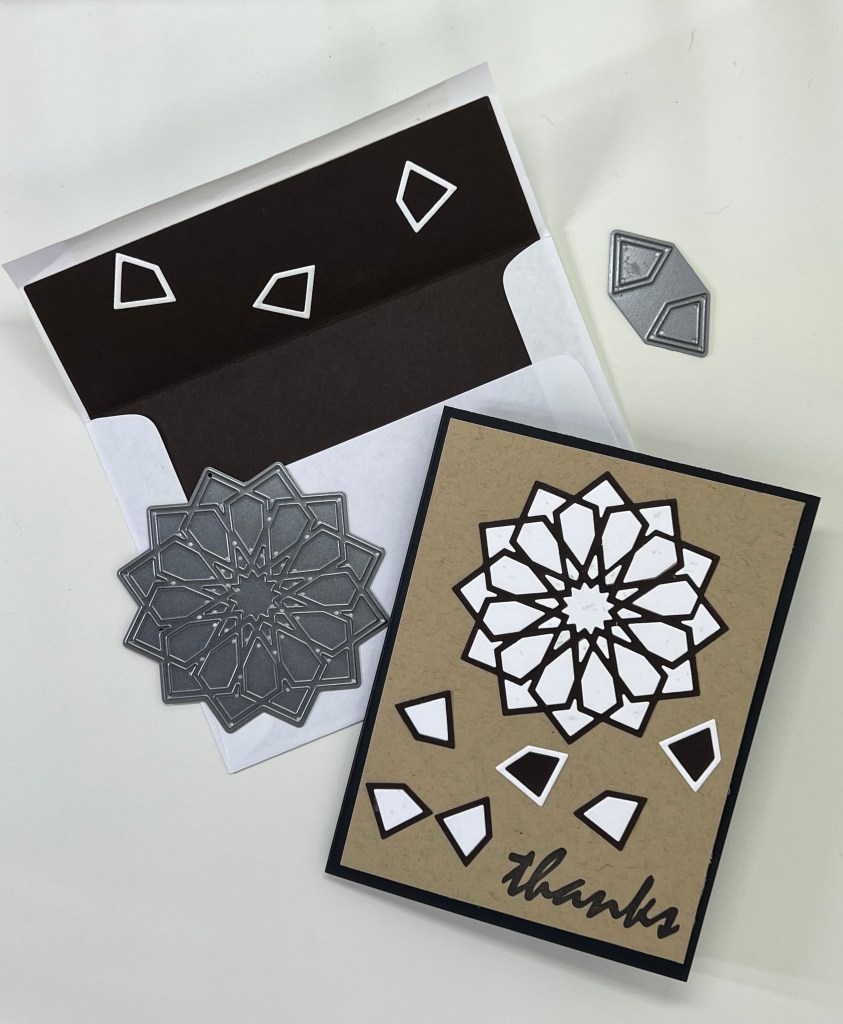
On this card, using two additional dies from the Altenew Dodec Star Die set, I repeated the same process only with much more “therapeutic” paper piecing. If my math is correct, there are 36 seperate white pieces of paper placed into the black outline of the large Dodec die. This really is a fun process once you get all the small pieces corralled on your craft desk.
Using the smaller die, cutting both from black and white, I repeated the same process and alternated between black and white, placing the pieces randomly below the larger image. The “thanks” sentiment featured on this card is also from the Atlenew “Many Thanks” stamp set. It is all but impossible not to find an appropriate Thank You of some type from the “Many Thanks” set. So glad I purchased it! On both cards the stamped sentiment was done with Altenew, Jet Black mixed media ink.
As always, I completed the set with a black envelope liner and randomly placed white geometric figures on the inside.
I hope you’ve enjoyed this post of my “Guy” cards. Honestly, I think this card would be great using any selection of colors and would be equally as masculine. I would love to hear your opinion. Critiques are welcomed. Thanks for stopping by!
Jan