Eighth Altenew Class Submission: Irresistible Inking Techniques

Awesome! That’s the single perfect word for this class. Inking techniques that allow you to stretch the use of your inks and develop matching layers of paper for each card. Hats off to Sara Naumann for teaching these techniques! I thoroughly enjoyed it and learned a lot.

After choosing one single stamp from the Altenew Gardenia Duo stamp set, I decided to heat emboss the image onto HQ watercolor paper (300 gsm) using Princess Gold embossing powder by Ranger. Using the image cut-out from the stencil set, I masked the flower and added leaves as if they were peaking out from behind the flower.

Next I placed smudges of Altenew mixed media ink’s in Frosty Pink, Frayed Leaf, Coral Berry and Evergreen on my glass craft mat along with a small water cup. Using Frosty Pink, I highlighted most areas on the gardenia petals leaving some white areas for contrast. Following with Frayed Leaf on the leaves, I then added darker colors of Coral Berry on the inside of the gardenia and small drops of Evergreen at the core of the leaves and along the veins. The flower was finished quickly because there was no waiting for ink to dry. Heat embossing is fast and it helps to keep the ink inside the lines.

While the floral image dried, I cut a slightly larger piece of watercolor paper and began to ink a very small acrylic block with Frosty Pink. After spritzing the block with water, I carefully inked the paper with four lines across the page and then inked the edges of the panel with the Frosty Pink ink pad. I love the fact that my second layer matches my gardenia!

Next I put a generous amount of Frayed Leaf on my glass mat and mixed it with water. Using a brayer (for the first time EVER!), I rolled a third, slightly larger, watercolor page with the mixture. Afterwards, I inked edges of this watercolor paper with the Frayed Leaf ink pad.

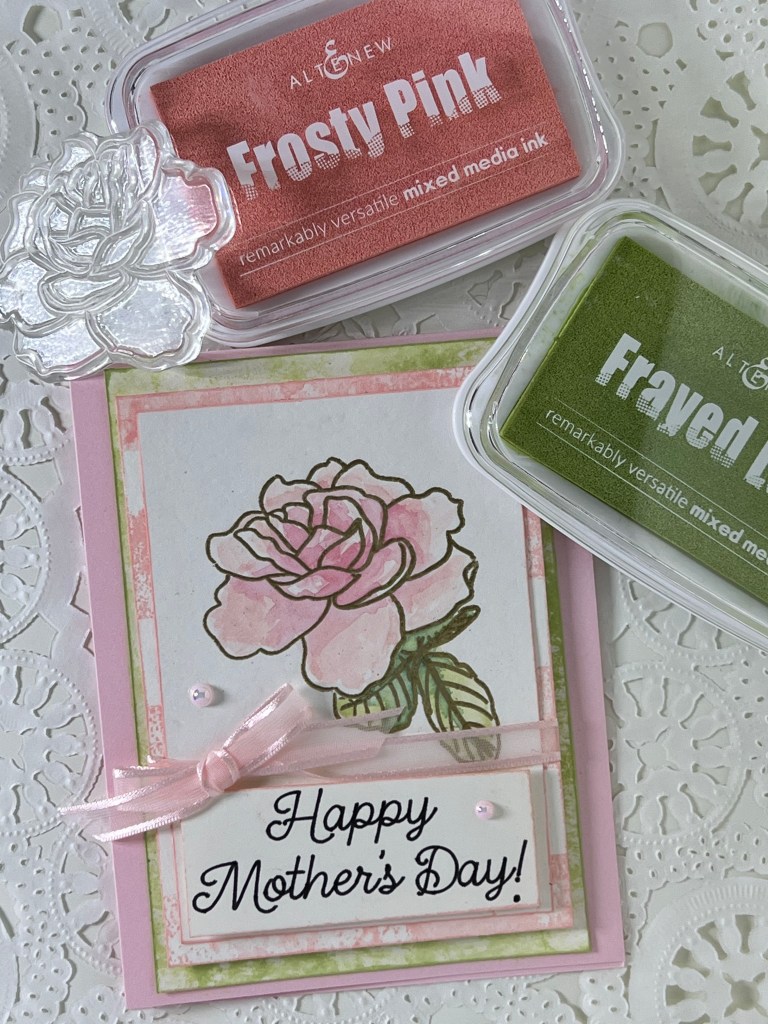
As I began to assemble the card, I realized it would make a wonderful Mother’s Day Card for my soon to be 88 year-old mother! Using Alyssa Stencil Script font and my Cricut, I printed the ‘Happy Mother’s Day!‘ sentiment using black ink on Neena Classic Crest 110 lb cardstock. I then cut a small rectangle around the text, edged it with Frosty Pink, edged the floral focal piece with Frosty Ink and began to build the card.

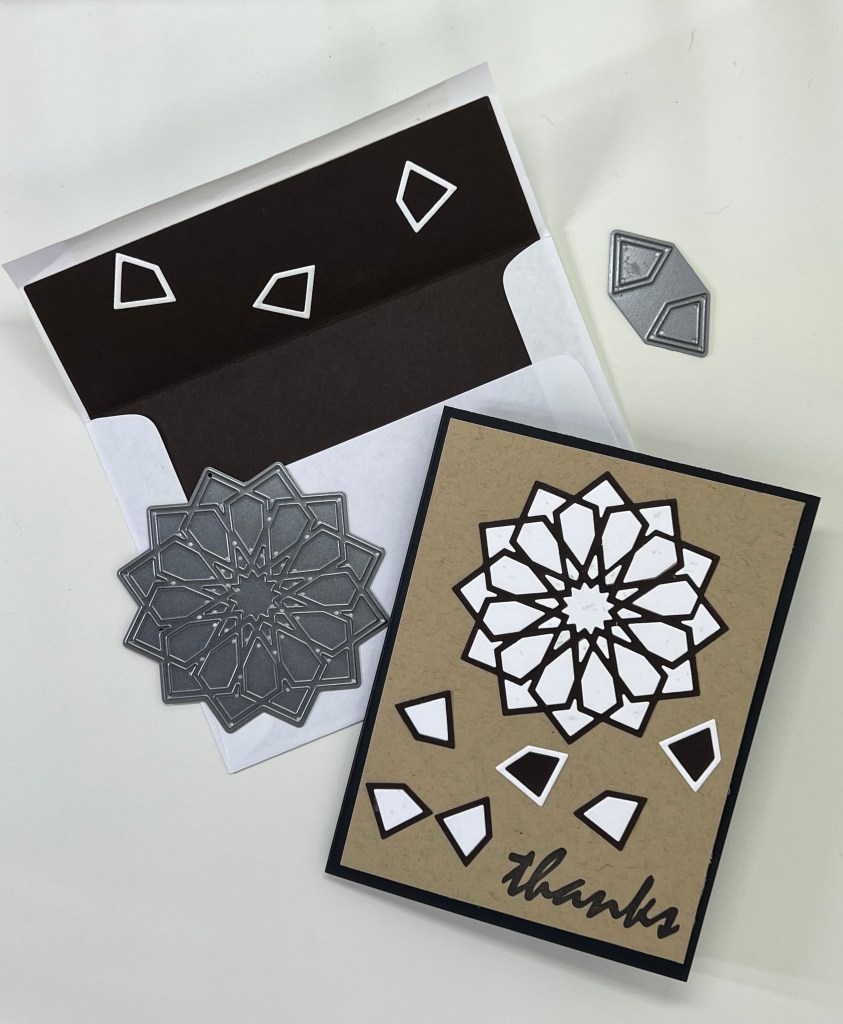
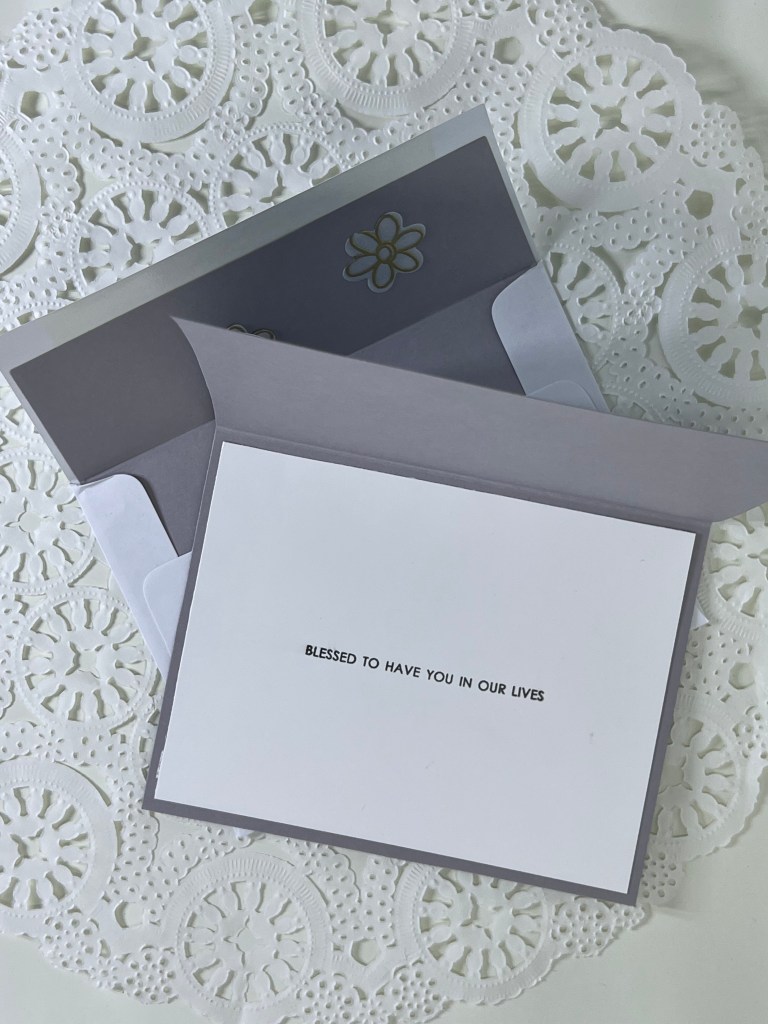
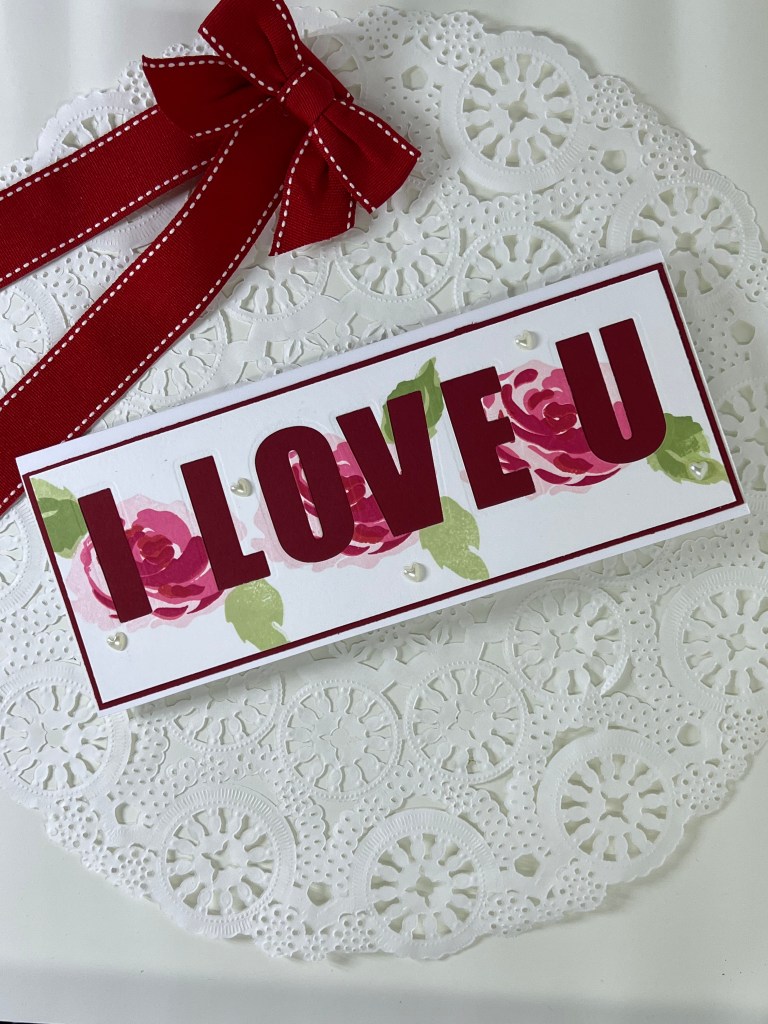
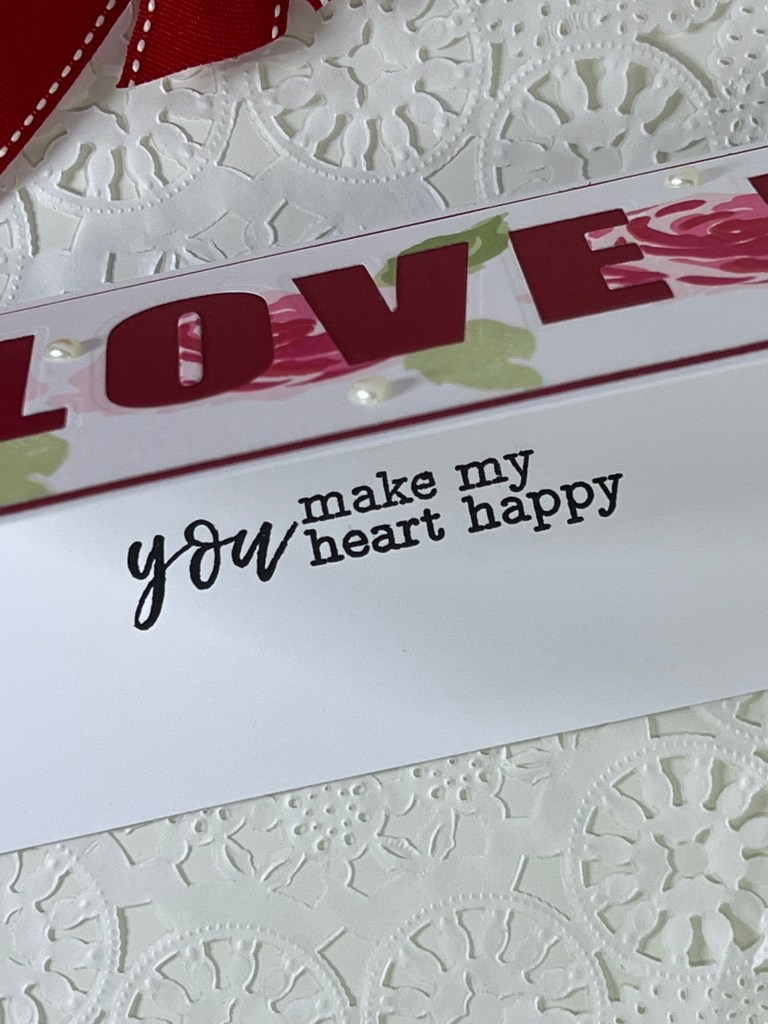
The sentiment is placed with foam tape at the bottom of the image. Both the image and the sentiment are then glued to the next layer bearing the light stripes of Frosty Pink. Next I wrapped the ribbon around, tied a bow and secured it all onto the green brayered image with foam tape. Lastly, all the pieces were adhered to Bazzill, Cotton Candy cardstock and topped off with three Pearly Pink Baubles from Trinity Stamps. For me, my card is never complete without a corresponding envelope so I used The Stamps of Life envelope liner with hearts to finish my project.

This card was lots of fun to make! I really loved this class and all it had to offer in techniques. Thanks so much for dropping by and please don’t hesitate to comment. Critiques are always welcomed!

Jan

Seventh Altenew Class: For the Guys!

Admittedly, after 36 years of marriage, you’d think I would have some experience making cards for the handsome man in my life! Since I didn’t find paper crafting until well past the dating years, I have to admit this class threw me a little. Leave it to Atlenew to save the day with the first lesson, in the series of six, for this class. It was all about geometrics.

Most of my Altenew inventory, if not all of my Atlenew inventory, is full of floral dies, floral stamps, floral embossing folders and stencils…except one! Thankfully, I had purchased the Altenew Dodec Star Die early on in my introduction to Atlenew so that geometric set became my card inspiration.

The color pallet for this masculine cards is very basic. Starting with a black card base and adding a kraft card stock panel, I built this card using one simple die from the Dodec set cutting several times from black card stock and then white card stock. Seperating all the small pieces, I glued two black outlines to the kraft stock and then one white outline to the kraft stock. Just like a small jigsaw puzzle, I began to glue the inside pieces from each cutting until all three geometric images were complete.

Placing the die cuts into each design is a tedious but very therapeutic process that I grew to enjoy.

Finally, I stamped the “THANK YOU” sentiment from the Altenew “Many Thanks” stamp set. Adding one last white geometric outline to my black envelope liner, the card and envelope are ready to go!

This was my favorite, but not my husband’s, so since this lesson was all about “Guy” cards…I acquiesced and featured his favorite first 🙂

On this card, using two additional dies from the Altenew Dodec Star Die set, I repeated the same process only with much more “therapeutic” paper piecing. If my math is correct, there are 36 seperate white pieces of paper placed into the black outline of the large Dodec die. This really is a fun process once you get all the small pieces corralled on your craft desk.

Using the smaller die, cutting both from black and white, I repeated the same process and alternated between black and white, placing the pieces randomly below the larger image. The “thanks” sentiment featured on this card is also from the Atlenew “Many Thanks” stamp set. It is all but impossible not to find an appropriate Thank You of some type from the “Many Thanks” set. So glad I purchased it! On both cards the stamped sentiment was done with Altenew, Jet Black mixed media ink.

As always, I completed the set with a black envelope liner and randomly placed white geometric figures on the inside.

I hope you’ve enjoyed this post of my “Guy” cards. Honestly, I think this card would be great using any selection of colors and would be equally as masculine. I would love to hear your opinion. Critiques are welcomed. Thanks for stopping by!

Jan

Fifth Altenew Class: Easy Die Cutting Techniques

There was lots to learn in this class! The instructor demonstrated the use of dies as stencils, embossing with dies, cutting vellum with dies, inlaid die cutting, embossing with die cuts and the use of negative space from dies. (Does that sentence remind you of Bubba talking about Shrimp in the movie Forest Gump? Sorry…I just had to say it!)

For my cards, I decided to try my hand at heat embossing on vellum die cuts. But first I needed a background for my card. Believe it or not, I have never tried an ink ombre backdrop…so this was a first!

My first Ombre ink!

Using Altenew mixed media ink colors Arctic, Caribbean Sky and Persian Blue (with a blending brush) on Hammermill Premium Color Copy Cover 100 lb cardstock, I started with light colors on the left and worked to the right with darker colors. This is definetly something I’ll do more often because it was fun and easy. Next I cut my “blessed” from Altenew Mega Blessed Die using 110 lb Neenah Classic Crest. I cut two of the same die and glued them together for a little more dimension and strength. After glueing the die cut to the front of my card, I heat embossed the flower and leaved stems from Altenew Doodle Blooms. My vellum choice is from The Paper Company and it’s called Translucent. It has a beautiful pearlized sheen to it and is not quite as translucent as typical vellum. The emobossing powder is Princess Gold by Ranger. I mounted the card front on gray cardstock. If the leaves look like they are popping up, its because they are. By design, I wanted a little bit of deminsion so I didn’t glue them completely down. For a finishing touch I added three Trinity Stamp “Buble Blow Out” gems. The inside sentiment, “BLESSED TO HAVE YOU IN OUR LIVES,” was stamped in Altenew Jet Black and is from the Many Thanks sentiments by Altenew. I just got the sentiment set and I love it!

Adding an envelope liner to match the card exterior is a must! I also embellished the inside of the envelope with a couple of heat embossed vellum flowers just for fun.

My next card design was all about the negative and the All About Us Altenew stamp set! Using my Altenew Inks Frosty Pink, Coral Berry, and Ruby Red, I stamped the rose from All about Us across a slim line card front in a repeating pattern. The leaves were stamped from the same set using Frayed Leaf and Forest Glades. Next, I used my Altenew Caps Bold Alphabet Die to cut out the words I LOVE U! To make the wording stand out more, I adhered the card front to a dark red card stock and placed both on a slim line card cut from Neenah Classic Crest 100 lb. The finishing touch here was Park Lane pearl hearts.

The final addition was the sentiment “you make my heart happy” once again, from the very versital set “All about Us” stamped in Altenew Jet Black ink.

Another positive to a “negative” die card is the fact that I now have large “I LOVE U” lettering cut from beautiful rose print cardstock. Ready for another new card!

Hope you’ve enjoyed this post. As always, constructive critique is always welcomed!

Thanks for dropping by!

Jan